Adding a Participant
Adding a Participant
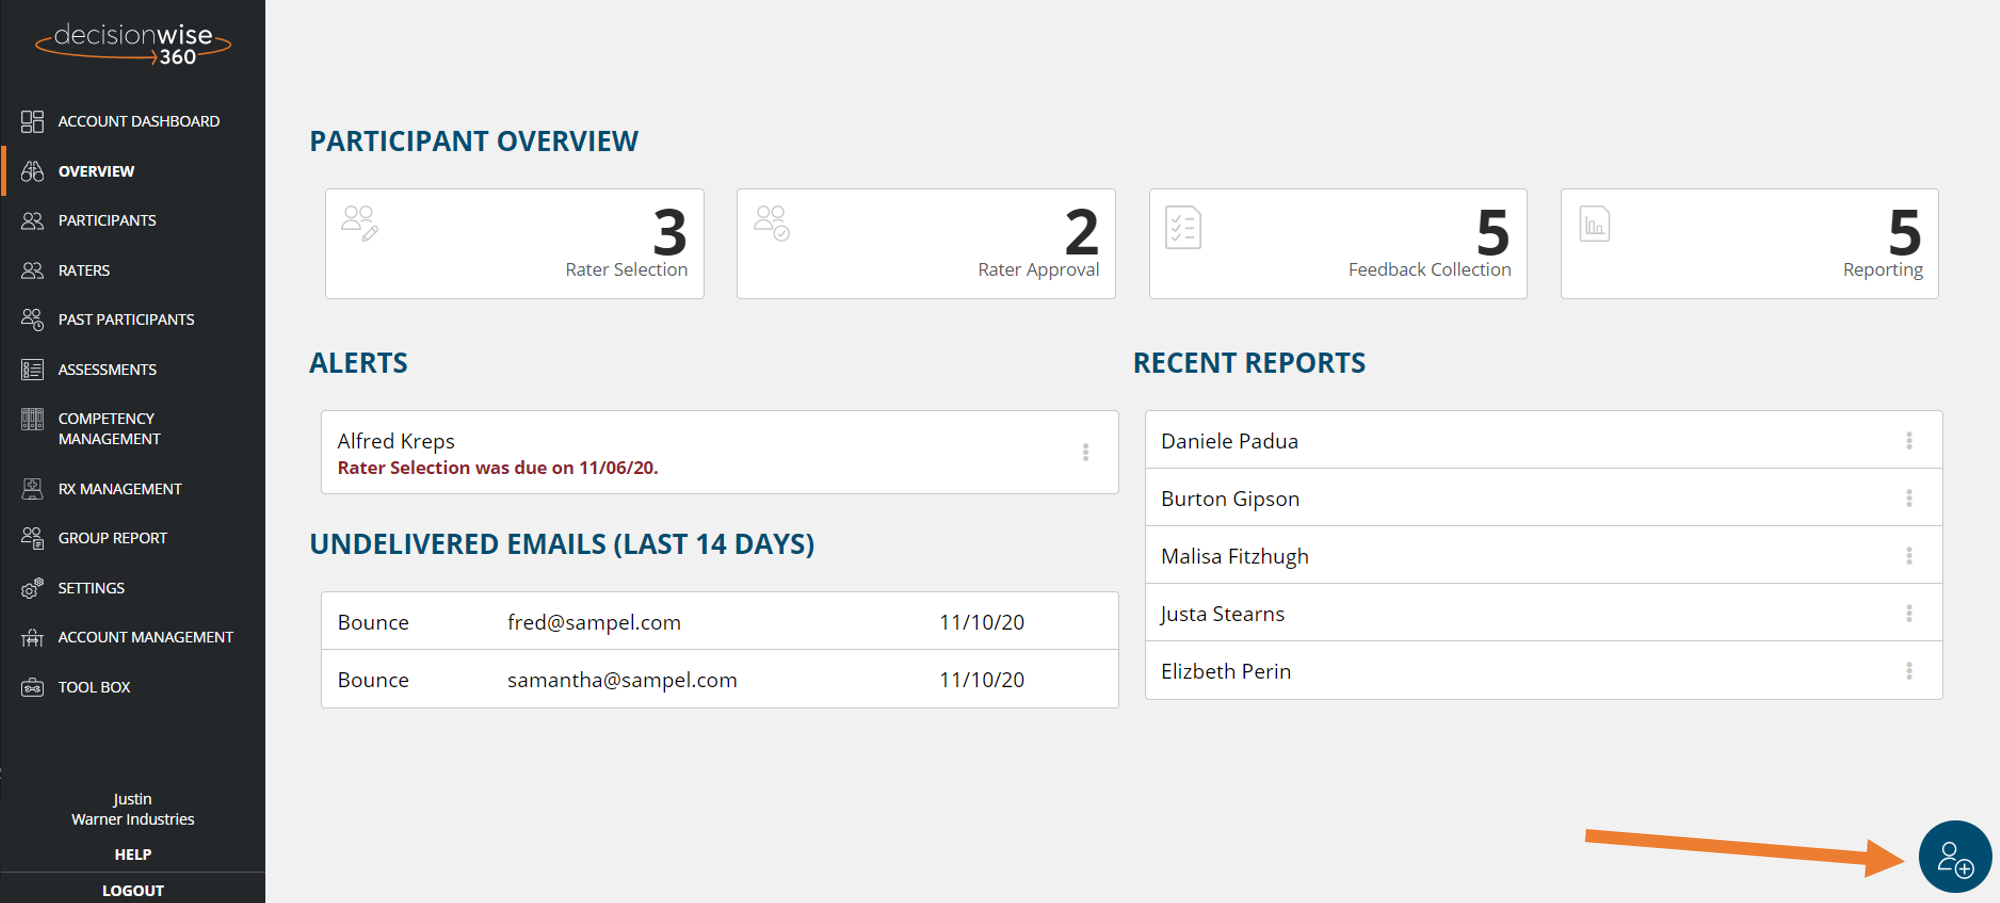
From the “Overview” section in the gray left-hand navigation area, click the blue button in the bottom right corner to add a participant. You will then have two options:
- Add a participant who will select their own raters.
- Add a participant with raters preselected.
Add a Participant Who Will Select Their Own Raters
There are two ways to add participants who will select their own raters:
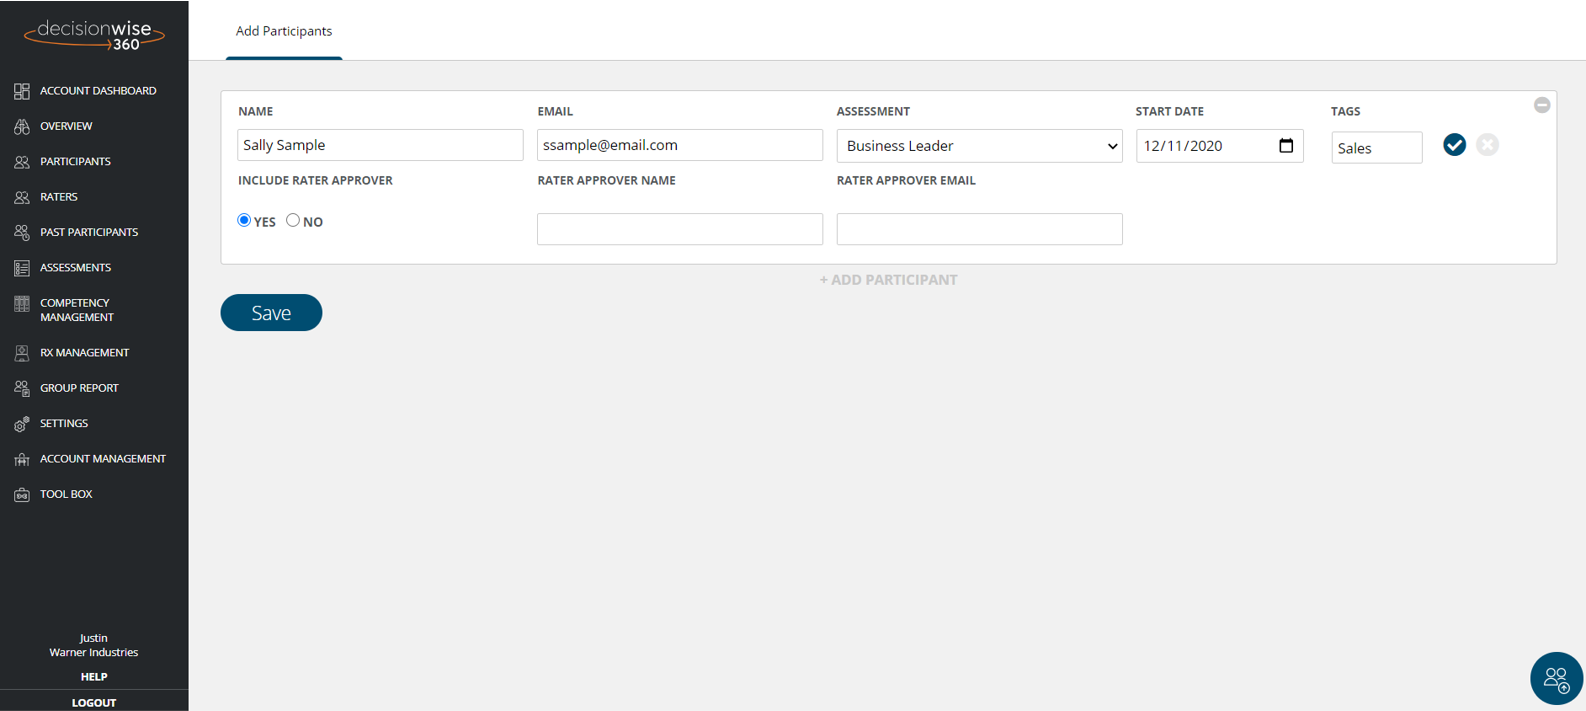
Option 1 – Manual Entry: Enter the participant’s name, email address, select the survey type, choose the start date, and add necessary tags.
Explanatory Note: Tags can be used to organize participants when managing a cohort of participants or when wanting to track a participant for future analysis. Tags may indicate position in the company, location, cohort date, or other demographics you decide to track. Tags are great way to group participants for recall at a later date.
Tip: If you are going to create a group report, then ensure that your mark all participants in that group with a unique tag so the group report can be prepared in the system.
- Tags must be added one at a time (enter the tag and click add for each requested tag).
- Rater Approval: If you want to approve a participant’s selected raters, select “Yes” under “Include Rater Approver.” Enter the name and email address of the approver.
- When adding additional participants, click the “+ Add Participant” gray link and repeat the process.
- After you are finished adding participants click the “Save” button.
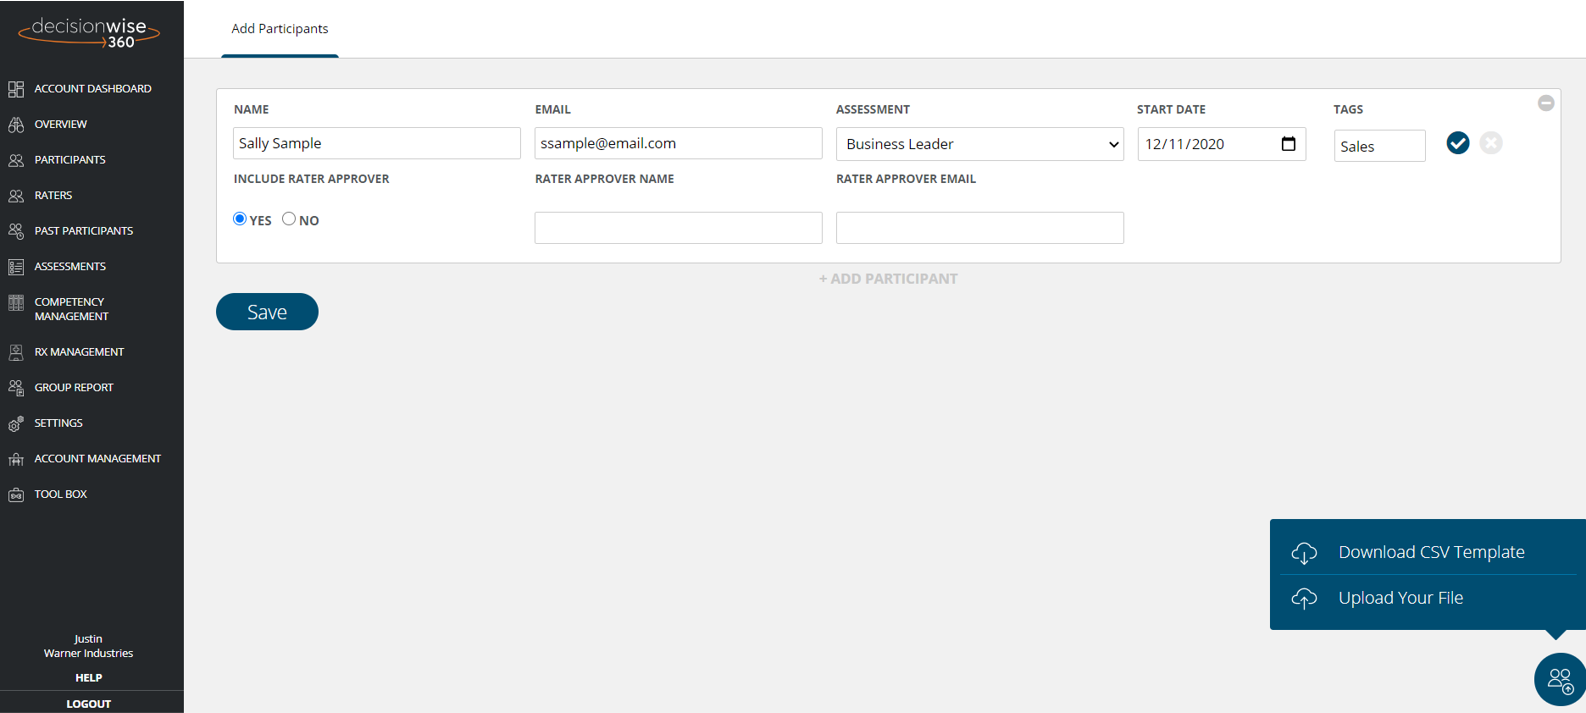
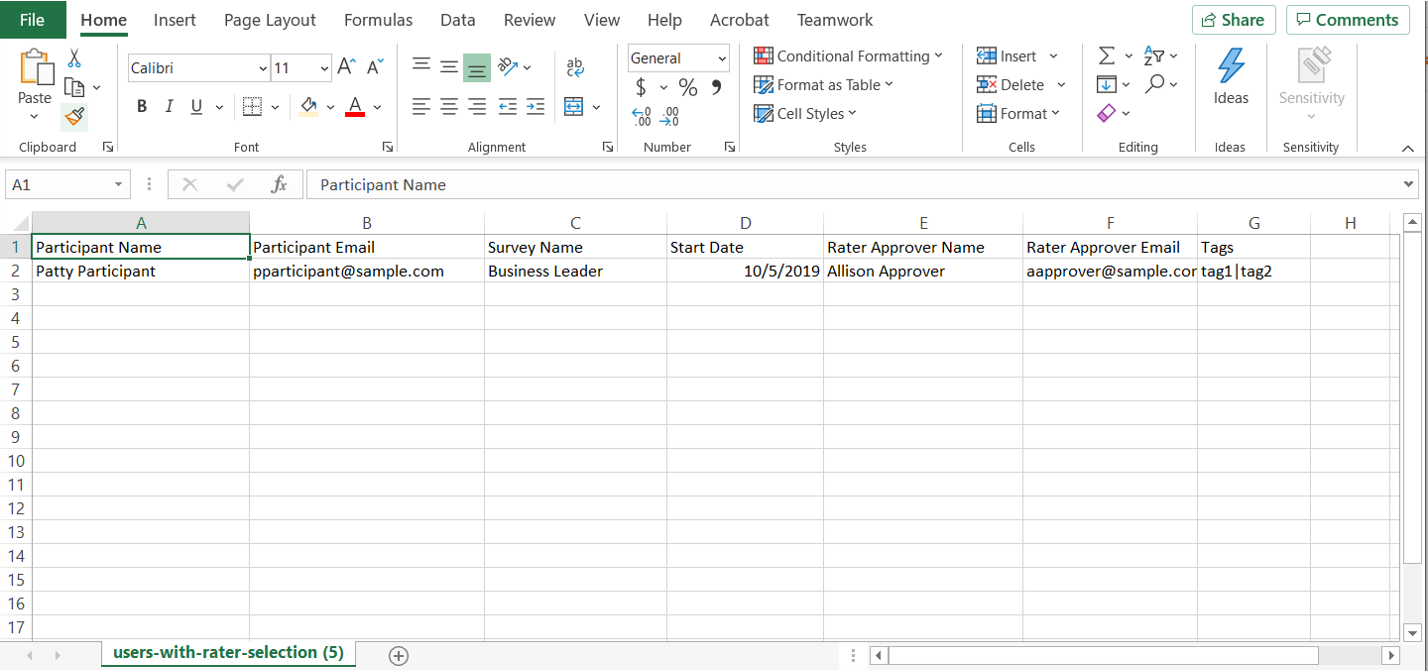
Option 2 – Bulk Upload: Click the blue button in the bottom right corner to download a CSV (flat file) template for bulk upload. Download File Here
- Complete the CSV file exactly as the example on row 2. When you are done, delete example row 2 to prevent this dummy data from being included in your upload.
- Special Note: All tags must be separated using the pipe key “|.” This key is found directly above the “enter” on most keyboards. Press shift and the “\ |” key to input the pipe symbol.
- After you have completed the CSV file, save the file to your computer. Click the blue button again and choose “Upload Your File” Select your file from your computer and upload to the platform.
- Review the now-populated names and details and make any necessary adjustments..